You do not need to be a professional detailer or spend thousands at a body shop. With the right tools, patience, and a clear plan, any beginner can restore their vehicle’s paint at home.
This is not a rushed job. Restoring paint is a process of careful steps that build on one another.
Let us dive into the four essential steps that will make your paint smooth, glossy, and eye-catching again.
Step 1: Deep Clean the Surface with a Clay Bar
Before you touch a polisher or sandpaper, you need to make sure the surface is absolutely clean. Even after a proper wash, paint can hold onto contaminants such as tree sap, rail dust, brake dust, or overspray.
These tiny particles embed into the clear coat, creating roughness that your hands may barely detect. If you skip this step, your polishing pads will grind these particles into the paint, creating new scratches.
The solution is a clay bar. A clay bar glides across the paint, grabbing and lifting away those stubborn contaminants. It prepares the surface so that sanding and polishing can work effectively.
A great beginner clay bar kit is the Chemical Guys Medium Clay Bar and Lubricant Kit. It includes everything you need in one box.
How to Clay Your Paint
- Start with a freshly washed and dried vehicle. Any loose dirt should already be gone.
- Break off a piece of clay about the size of your palm and flatten it into a small puck.
- Work on one panel at a time (about 2 ft x 2 ft). Spray plenty of lubricant on the surface—either a dedicated clay lubricant or plain water with a bit of car shampoo. The key is to keep the area slick so the clay glides smoothly.
- Move the clay back and forth gently. Do not press hard. You will feel it grab at first, then start gliding more freely as it removes contaminants.
- Once the clay slides without resistance, wipe the panel dry with a clean microfiber towel.
- Knead the clay regularly to expose a clean surface. If you drop it, throw it away. Contaminated clay can scratch.
By the end of this step, your paint should feel as smooth as glass. That slick surface is the perfect canvas for correction.
Step 2: Wet Sand Light Imperfections with 3000-Grit Sandpaper
This step may sound intimidating, but when done correctly, wet sanding is one of the most effective ways to level out scratches and dull areas.
Using ultra-fine 3000-grit sandpaper, you can gently remove a tiny layer of clear coat, flattening scratches and creating a uniform surface.
How to Wet Sand Safely
- Soak the sandpaper in clean water for 10–15 minutes before starting. Add a drop of car shampoo to the water to increase lubrication.
- Keep the paint surface wet at all times. You can use a spray bottle or a small bucket and sponge to keep re-wetting the area.
- Sand gently across the scratch, not along it. Light, controlled strokes are key. You are not trying to remove the scratch completely in one pass—let the paper do the work slowly.
- Watch for a thin white slurry to appear. That is clear coat material being abraded, which is normal.
- Be extra careful around edges and creases, where paint is thinnest. It is easy to sand through in these areas.
- Stop frequently, wipe the area dry, and check your progress. Once the scratch or defect is minimized, stop sanding.
The surface will look dull and hazy after sanding. Do not panic. That haziness is exactly what the next steps will polish away.
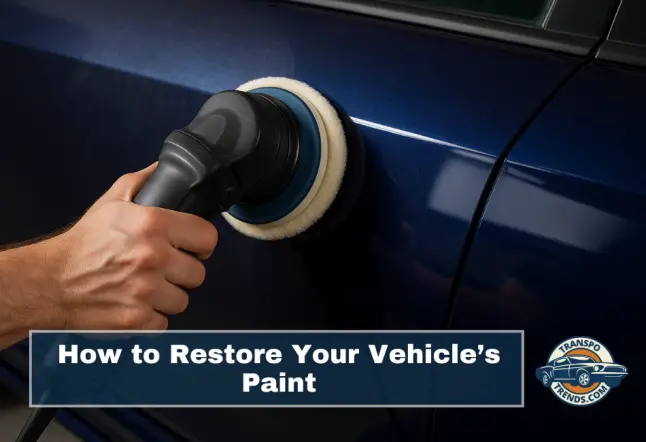
Step 3: Polish with a Cutting Compound and Dual-Action Polisher
Now that the surface is smooth and level, it is time to bring clarity back. This is where cutting compound and a dual-action polisher come into play. This step removes the fine sanding marks and oxidation, restoring depth and gloss.
For beginners, a user-friendly option is the DEWALT 20V Cordless Dual Action Polisher. Pair it with a medium cutting pad and a reliable compound such as Meguiar’s Ultimate Compound.
Polishing Technique
- Work in the shade or a cool garage. Heat causes compounds to dry too fast and perform poorly.
- Apply a few small dots of compound onto the pad or panel.
- Place the pad flat on the surface and start the polisher at a low speed to spread the product evenly.
- Increase to medium speed and make slow, overlapping passes in a cross-hatch pattern (side to side, then up and down).
- Use light to moderate pressure. The tool and compound should do the work, not brute force.
- After a few passes, stop and wipe the panel with a clean microfiber towel to inspect the results.
Work in small sections (2 ft x 2 ft) at a time. Trying to tackle a whole panel at once is a recipe for uneven results. Also, clean your pad regularly—spent compound and paint residue can clog the pad and reduce its cutting power. If the pad gets saturated, switch to a fresh one.
Once you finish compounding, the surface should look dramatically clearer, but you may notice faint micro-swirls or a slight haze. That is where the final step comes in.
Step 4: Refine the Finish with a Finishing Polish and Pad
The last step transforms good results into showroom-level gloss. Switching to a soft finishing pad and a fine polish removes any light swirls or holograms left behind by the compound. It essentially burnishes the paint to perfection.
Finishing Technique
- Apply a few pea-sized drops of finishing polish to the pad.
- Work the polisher at a moderate speed with very light pressure. The goal is refinement, not cutting.
- Make 2–3 overlapping passes per section until the polish breaks down into a thin film.
- Wipe the panel with a clean microfiber towel to reveal the true finish.
Inspect the paint under good lighting. You should see no swirls, no haze—just a deep, clear reflection. This is the “wow” moment. For extra protection, you can apply a wax or sealant afterward to lock in the shine.
Beginner Mistakes to Avoid
- Skipping the clay bar: Polishing over embedded dirt will create more scratches.
- Sanding too aggressively: 3000-grit is gentle, but too much pressure can burn through.
- Working in direct sunlight: Heat shortens working time and increases the risk of damage.
- Rushing through sections: Paint correction is about patience and control.
Quick Summary Table
| Step | What It Does | Tools / Products | Key Tips |
|---|---|---|---|
| 1. Clay Bar | Removes bonded contaminants from paint | Clay bar kit, lubricant spray | Keep surface wet, knead clay, throw away if dropped |
| 2. Wet Sand | Levels scratches and imperfections | 3000-grit sandpaper, water, sponge | Sand across scratch, keep surface soaked, avoid edges |
| 3. Compound | Removes sanding haze and oxidation | Dual-action polisher, cutting pad, cutting compound | Work in shade, light pressure, small sections |
| 4. Finish Polish | Removes micro swirls, enhances gloss | Finishing pad, fine polish | Light pressure, cross-hatch passes, wipe clean |