Replacing struts is not rocket science. With the right tools, patience, and guidance, you can tackle this job at home and save a serious chunk of money. In this guide, I will walk you through the entire process just like we would in the garage together.
Why Struts Matter More Than You Think
Struts do not just make your car ride smoothly. They are structural components that support the vehicle’s weight, absorb shocks, and keep the wheels aligned during braking and cornering. When they wear out, the signs are pretty clear:
- The ride becomes bouncy and floaty, especially after bumps.
- The front end may dive forward when you brake hard.
- You might hear knocking noises over uneven roads.
- Tires can develop cupped or uneven wear patterns.
Worn struts can increase stopping distances and reduce overall stability. They also put extra stress on other suspension parts, which can snowball into more expensive repairs.
Most manufacturers recommend inspection or replacement every 50,000 miles or sooner if you drive on rough roads.
Tools and Gear You Will Need
Before you even touch a bolt, gather your equipment. Preparation is what separates smooth jobs from stressful ones. Here is a solid list:
- Floor Jack and Jack Stands: Safety is non-negotiable. A sturdy floor jack and a pair of quality jack stands will keep the vehicle secure. Never rely on a jack alone.
- Lug Wrench or Impact Gun: A powerful cordless impact like the DEWALT 20V impact wrench makes removing lug nuts and strut bolts much easier.
- Socket and Wrench Set: Sizes vary by vehicle, but expect to use 17mm, 19mm, and 21mm frequently. Have open-end wrenches for backup.
- Torque Wrench: Proper torque is critical for suspension components. A reliable torque wrench ensures everything is tightened to factory spec.
- Penetrating Oil: Rusted bolts are a reality. A few sprays of PB Blaster or WD-40 can save you hours of frustration.
- Hammer and Punch: Useful for driving out stubborn strut bolts.
- Pliers and Screwdrivers: Handy for removing clips, brackets, or caps.
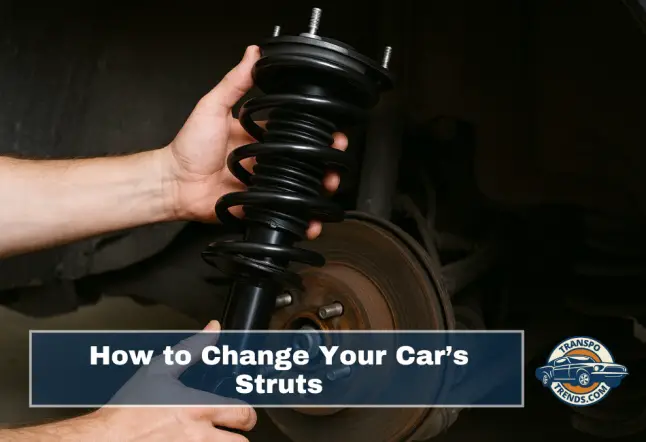
- Replacement Struts: Ideally, use complete strut assemblies (also called quick struts). They come pre-assembled with the spring and mount, which eliminates the need for a spring compressor.
Pro tip: Keep a bolt bucket on hand. Toss every nut and bolt you remove into the bucket. It prevents the classic “where did that bolt go?” moment later.
Step-by-Step: How to Change Your Car’s Struts
1. Lift the Vehicle and Remove the Wheel
Park on a flat surface, engage the parking brake, and chock the wheels. Jack up the car and place it securely on jack stands. Once stable, remove the wheel to expose the strut assembly. Take a moment to inspect it. Look for leaking oil, cracked mounts, or damaged components.
2. Disconnect the Sway Bar Link and Brackets
Most struts have sway bar end links attached to them. These keep the car stable during cornering. Use your socket and wrench or an impact gun to remove the nut securing the link to the strut. If the stud spins, hold it with an Allen key while turning the nut.
Next, remove any brackets holding brake hoses or ABS sensor wires to the strut. These are usually 10mm bolts. Gently set the lines aside.
3. Support the Suspension and Remove Strut Bolts
Place a jack under the lower control arm and lift it just enough to take the tension off the strut bolts. Then tackle the two large bolts that secure the bottom of the strut to the steering knuckle.
These are usually very tight and may be rusted. Break them loose with a breaker bar or zip them off with the impact gun. Drive the bolts out with a hammer and punch.
Once those bolts are out, the strut is free from the knuckle, but it may still be snug. A little downward pressure on the hub usually frees it.
4. Remove the Upper Mount Nuts
Open the hood and locate the three (sometimes four) nuts that secure the strut mount to the chassis. Remove the plastic cap if there is one. Do not remove the center nut on the strut. That nut holds the spring together and should only be handled with proper spring compression equipment.
Remove the three outer nuts while supporting the strut from below. Once the last nut comes off, the strut will drop free. Carefully guide it out of the wheel well.
5. Prep the New Strut
Stand the old and new struts side by side. Confirm that they match in length and mounting points. If your new strut came with fresh hardware, use it. Transfer any clips or brackets that need to move over.
This is also a good time to clean the mounting surfaces to ensure a proper fit.
6. Install the New Strut
Angle the new strut into place, inserting the top mount studs through the holes in the strut tower. Thread one top nut by hand to hold it in position. Then line up the bottom of the strut with the knuckle. You may need to raise or lower the jack under the control arm to align the bolt holes.
Once aligned, slide the bolts through, tap them into place, and thread on the nuts. Do not fully torque yet.
7. Secure Top Mount and Bottom Bolts
Tighten the top mount nuts evenly, then snug up the bottom bolts. Manufacturer torque specs vary, but bottom bolts are typically torqued between 85 and 115 ft-lbs on many vehicles.
Upper mount nuts are usually torqued around 20–30 ft-lbs. Always refer to your specific vehicle’s service manual or a trusted database such as RepairPal for exact specs.
8. Reconnect the Sway Bar and Brackets
Reattach the sway bar end link. If the holes do not line up, lift the control arm slightly with the jack to align them. Tighten the link nut securely. Reattach the brake hose bracket and ABS sensor clips.
9. Double-Check and Torque Everything
Go through every fastener you removed and torque them to specification. This is not a step to rush. Suspension bolts are critical for safety. Verify bottom bolts, sway bar link, upper mount nuts, and any brackets.
10. Reinstall the Wheel and Lower the Car
Mount the wheel back onto the hub and tighten the lug nuts in a star pattern. Lower the car carefully and remove the jack stands. Once the vehicle is on the ground, torque the lug nuts to the manufacturer’s spec.
11. Test and Align
Give the car a firm push down on the fender to settle the suspension. It should rebound once and settle without multiple bounces. Take the car for a slow, careful test drive. Listen for any unusual noises.
Finally, schedule a professional wheel alignment. Replacing struts can change your alignment angles, which can cause poor handling and tire wear if left unchecked.
Quick Reference Table
| Step | Tools Needed | Key Tips |
|---|---|---|
| Lift Vehicle & Remove Wheel | Floor jack, jack stands, impact gun | Secure the car before starting. Safety first. |
| Disconnect Sway Bar & Brackets | Wrenches, Allen keys, sockets | Free all attachments before removing bolts. |
| Remove Strut Bolts | Breaker bar, hammer, punch | Support suspension to relieve tension. |
| Remove Top Mount Nuts | Ratchet, sockets | Support the strut as you remove the last nut. |
| Prep New Strut | Visual inspection | Match old and new, transfer brackets. |
| Install New Strut | Jack, sockets | Top first, then bottom bolts. Align carefully. |
| Torque & Reconnect | Torque wrench | Use factory specs, double-check every bolt. |
| Reinstall Wheel & Lower | Lug wrench, torque wrench | Tighten in star pattern, final torque on ground. |
| Test & Align | None | Bounce test, short drive, alignment appointment. |
Replacing struts is one of those jobs that transforms how your car feels. The first drive afterward is always satisfying. The steering feels tighter, the ride is more controlled, and the bouncing that once made you nervous disappears. With some effort and the right approach, you have just handled a major suspension repair like a pro.