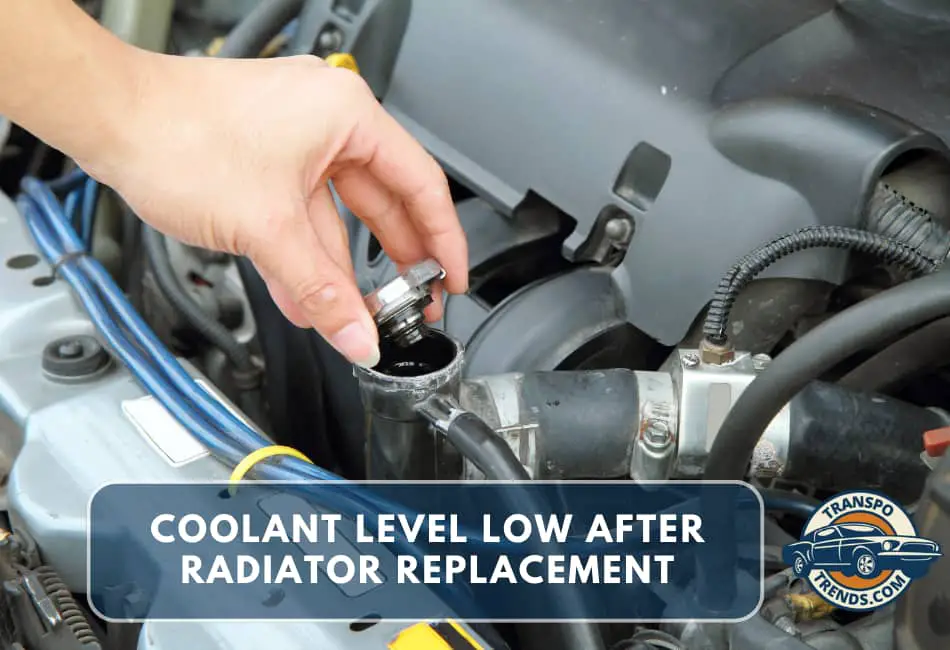
When it comes to maintaining your vehicle, replacing the radiator is a common procedure that ensures the engine sustains the ideal operating temperature.
Following the replacement, it’s crucial to maintain proper coolant levels as this fluid aids in heat dissipation, prevents engine overheating, and guarantees your vehicle’s longevity.
However, it’s not uncommon to notice low coolant levels post-replacement. This can be due to several reasons, such as a potential leak, trapped air, or ineffective coolant circulation.
In the following sections, we will detail these causes to provide a comprehensive understanding of why you might be facing this issue after a radiator replacement.
1. Air Trapped in the Cooling System
How Air Gets Trapped During Radiator Replacement
The air might get trapped in the cooling system during a radiator replacement. This typically happens when the coolant is drained from the old radiator before its removal, and the new radiator is subsequently installed without bleeding the system to ensure all air pockets are removed.
Bleeding the Cooling System
Bleeding the cooling system is essential to remove trapped air that might disrupt coolant circulation.
If left unchecked, these air pockets create hot spots within the engine since air, unlike coolant, is a poor conductor of heat.
This can lead to uneven cooling, causing engine overheating and serious damage over time.
Steps for Properly Bleeding Air from the System
Properly bleeding air from your cooling system involves a few key steps:
- Ensure the engine is cool: Never bleed the system when hot, as it can lead to severe burns. Always let the engine cool down before starting the process.
- Loosen the bleed screw: The screw is usually located at the highest point on the cooling system. Loosen it to allow air to escape.
- Fill the radiator with coolant: Slowly fill the radiator with coolant. As the level rises, air trapped in the system will begin to escape through the bleed screw.
- Wait for a steady stream of coolant: Continue to fill the radiator until a steady stream of coolant (with no air bubbles) emerges from the bleed screw. At this point, tighten the screw.
- Run the vehicle: Start the engine and let it reach operating temperature. Monitor the temperature gauge to ensure the engine is not overheating. Finally, check the coolant level once more, adding more if necessary.
By following these steps accurately, you can effectively bleed your cooling system, ensuring optimal performance and longevity of your engine.
Using a coolant funnel and spill-free bleeding kit helps you refill and purge air pockets efficiently without messy spills.
2. Coolant Leak
Vehicle owners should be aware of several signs of a coolant leak. First, a visible coolant puddle beneath your car indicates a leak. Coolant is often bright green but can also be yellow or pink.
Second, a sweet smell from the car’s interior or exterior can indicate a coolant leak. This is due to the ethylene glycol found in coolant, which has a sweet odor.
Lastly, if your car’s temperature gauge consistently reads high or the engine overheats, it could mean there’s not enough coolant in the system, potentially due to a leak.
Causes of Coolant Leaks After Radiator Replacement
Several factors can contribute to coolant leaks after a radiator replacement. One common reason is improper installation or a bad seal.
Coolant can leak out if the radiator isn’t properly installed or the seals are not tight. Faulty radiator hoses or clamps can also cause leaks.
Additionally, the radiator itself can be defective. It’s essential to use high-quality parts and follow proper installation procedures to avoid these issues.
How to Identify and Address Coolant Leaks
Identifying a coolant leak requires a careful inspection of the cooling system. Look for wet spots or drips on the vehicle’s radiator, hoses, engine, and underneath.
A pressure test can also be performed using a special tool that pressurizes the cooling system to help identify leaks. A UV dye leak detection kit makes it easy to spot hidden coolant leaks using a simple handheld UV light.
Addressing a coolant leak depends on its source. If the leak originates from a hose or clamp, replacing the faulty parts usually solves the issue. If the radiator is the problem, it may need to be replaced or repaired.
For leaks caused by a bad seal, resealing the part can resolve the problem. Remember, it’s important to address coolant leaks promptly to prevent overheating and potential engine damage.
3. Insufficient Coolant Fill
Filling the cooling system with coolant to the manufacturer’s specifications is not just a recommendation; it plays a crucial role in the proper functioning and longevity of the engine.
Fill the System to the Manufacturer’s Specifications
The cooling system circulates coolant to absorb and dissipate the heat generated by the engine. This process depends on a specific coolant volume defined by the manufacturer.
If the coolant level is inadequate, it could result in inefficient cooling, leading to overheating, engine wear, and potential failure.
Moreover, an improperly filled cooling system could introduce air pockets into the system, which may cause further cooling inefficiencies and damage.
Steps for Properly Filling the Cooling System
Filling the cooling system is not a complex process but needs to be done with care. First, ensure the engine is cool.
Open the radiator cap and fill it with coolant until it reaches the top. Replace the cap and fill the coolant reservoir to the ‘MAX’ line.
Always use a pre-mixed 50/50 OEM-approved coolant to ensure proper corrosion protection and boiling-point performance.
After this, run the engine until it reaches its normal operating temperature, then let it cool and check the coolant level again in the radiator. If needed, add more coolant.
They Are at the Recommended Level
Regularly checking the coolant level in your vehicle can help prevent issues related to overheating or insufficient cooling.
The coolant reservoir, a transparent plastic tank near the radiator, has ‘MIN’ and ‘MAX’ marks. When the engine is cold, the coolant level should be between these marks.
Always check the coolant level when the engine is cool as the cooling system is under pressure when hot, and opening it could lead to severe burns.
If the coolant level is consistently below the ‘MIN’ mark, there could be a leak in the system, and further inspection is required.
4. Improper Bleeding Procedure
The bleeding procedure is one of the critical steps in maintaining a vehicle’s cooling system. When not carried out correctly, it can lead to numerous negative repercussions.
Not Following the Correct Bleeding Procedure
Ignoring the proper bleeding procedure can lead to inefficient cooling as air pockets may form, obstructing the coolant flow.
Continuous overheating can cause severe damage to the engine, affecting its performance and longevity. In worst-case scenarios, it can even lead to catastrophic engine failure.
Steps for Bleeding Air from the Cooling System
To bleed air from the cooling system accurately, follow these steps:
- Start with a cool engine. Open the radiator cap and fill the radiator with coolant up to the brim.
- Start the engine and let it run until it reaches operating temperature. This will allow the thermostat to open, and the coolant will start circulating.
- Turn off the engine and wait for it to cool down completely. Check the coolant level in the radiator – it may have dropped as the air pockets got displaced with coolant. Fill it up if necessary.
- Repeat the process until the coolant level no longer drops. This indicates that all the air has been bled out of the system.
Importance of Thoroughness in the Bleeding Process
Thoroughness in the bleeding process is crucial to ensure optimal engine performance. If any air remains in the system, it could lead to overheating and potential engine damage.
A meticulous approach to bleeding air from the cooling system enables the engine to function efficiently, extending its lifespan and ensuring a smoother driving experience.
5. Residual Air Release
Residual air release is when trapped air gradually escapes from the coolant system through the radiator cap or the overflow tank.
A. Explaining the Process of Air Naturally Escaping from the System
Air naturally escaping from a cooling system is a part of self-bleeding, which occurs when the engine heats up and the coolant expands.
This expansion pushes trapped air out of the system through the highest point, usually the radiator cap or the overflow tank.
As the engine cools down and the coolant contracts, it draws more coolant into the system from the overflow tank, replacing the expelled air.
Typical Duration for Air Release After a Radiator Replacement
The duration for air release after a radiator replacement varies depending on the vehicle model and the amount of air trapped in the system.
On average, the trapped air can take a few hours to a couple of days to completely escape the system.
How to Monitor and Top off Coolant During this Period
Keeping a vigilant eye on the coolant level in the overflow tank is critical during this period. As the air escapes from the system and is replaced by coolant, the level in the reservoir may drop.
It is essential to regularly check the coolant level and top it off as necessary to ensure the cooling system remains full and air-free.
Always ensure you’re topping up with the correct coolant type for your vehicle, and remember to do so only when the engine is cool to avoid the risk of scalding.
6. Coolant Evaporation
Over time, coolant can gradually evaporate from your vehicle’s cooling system. This natural process is due to your car’s engine’s constant heating and cooling cycle.
During operation, the heat generated by the engine causes some of the coolant to turn into vapor, which may escape through the radiator cap or the overflow tank.
This is a normal occurrence, but it could decrease coolant levels and potentially harm your engine’s performance if left unchecked.
Factors That Influence How Fast Evaporation Occurs
Several factors can affect the rate at which your coolant evaporates. These include the engine’s operating temperature, the type of coolant used, environmental conditions such as humidity and ambient temperature, and the integrity of your cooling system’s components. For instance, a higher engine temperature or leaky radiator cap can hasten evaporation.
Tips for Maintaining Proper Coolant Levels in the Reservoir
Maintaining proper coolant levels in your vehicle’s reservoir is essential for optimal engine performance.
Regularly check the coolant level, preferably once a week, ensuring it falls within the minimum and maximum marks on the reservoir. If the levels are low, top it up with the correct coolant type for your vehicle.
It’s also wise to have your cooling system inspected periodically for any leaks or damages that could lead to excessive coolant evaporation.
Finally, ensure the radiator cap is in good working order, as a faulty one could allow coolant to evaporate more rapidly.
A radiator pressure tester kit lets you verify cap performance and detect small leaks before they become costly.
Conclusion
In conclusion, your car’s cooling system and the coolant it contains are crucial to maintaining optimal engine performance.
Evaporation is a natural process influenced by numerous factors, including the engine’s operating temperature, the type of coolant used, environmental conditions, and the physical condition of your cooling system’s components.
Maintaining the correct coolant level is not just recommended—it’s vital. Regular checks, timely refills with the appropriate coolant, frequent system inspections for leaks or damage, and ensuring the radiator cap’s effectiveness are key to preventing potential performance issues or more serious damage.
Ignoring low coolant levels can lead to a chain reaction of negative effects on your vehicle’s performance, possibly resulting in costly repairs. Therefore, it’s essential to address any coolant level deviations promptly.
Remember, if you’re ever uncertain or have concerns about your car’s cooling system, don’t hesitate to consult a qualified technician.
They can provide expert advice and assistance, ensuring your vehicle continues to perform at its best.